
Hoy os traigo mi primer DIY o "hazlo tú mismo" como se ha llamado toda la vida.
Today I bring you my first DIY...
Acabamos de pasar el carnaval y mis alumnos se disfrazaron de indios... así que decidimos trabajar en Plástica algo relacionado con su disfraz: un ATRAPASUEÑOS...
We've just had Carnival and my pupils were disguised as indians... so we decided to create an indian element at the school: a DREAMCATCHER...

Cuenta la leyenda que el Gran Maestro de la Sabiduría se le apareció a un gran jefe indio en forma de araña, cogió una rama del árbol más antiguo (que tenía pelo de caballo, plumas y algunas semillas) y mientras tejía le explicó que la vida es como una tela de araña... las cosas buenas deben tejerse y mantenerlas, mientras que las cosas malas deben irse por el pequeño agujero del centro.
Y así fue como ese gran jefe llevó a su pueblo un atrapasueños, que deberían tejer y colgar sobre sus camas, para que los espíritus y buenos pensamientos que se aparecieran de noche en forma de sueños quedaran atrapados y descendieran hasta sus cuerpos, mientras que los malos espíritus y pensamientos no se quedarían y se irían para siempre.
Así que aquí os traigo el paso a paso para haceros uno...
Long ago an old spiritual leader had a vision where the great teacher of wisdom, appeared in the form of a spider. The spider took the elder's willow hoop which had feathers, horse hair, beads and offerings on it and began to spin a web. He spoke about the cycles of life... and there are many forces and different directions that can help or interfere with the harmony of nature. He gave the web to the leader and told to use it to help himself and his people... the web will catch the good ideas, and the bad ones will go through the hole.
It is hung above their beds to sift their dreams and visions. The good in their dreams are captured in the web of life and carried with them... but the evil in their dreams escapes through the hole in the center of the web and are no longer part of them.
1. ¿Qué necesitamos?
Necesitamos lana de dos colores, alambre del número 6 u 8 (más grueso es muy difícil de manipular), alicates de corte, tijeras, unas cuantas cuentas de colores, washi tape o cualquier otra cinta adhesiva y unas cuantas plumas.
1. What do we need?
We need two color wools, wire number 6 or 8 (higher is more difficult to use), wire cutters, scissors, some colored beads, washi tape and some feathers.

2. Preparando los aros...
Nuestro atrapasueños tiene cuatro aros (uno principal de unos 13cm de diámetro, y otros tres aros inferiores de unos 5cm de diámetro).
Para ello cortaremos cuatro piezas de alambre, una de 40 cm y otras tres de 15 cm cada una.
2. Preparing the rings...
Our dreamcatcher has four rings (one bigger with 13cm diameter, and other three with 5cm diameter each one).
So we'll cut four pieces of wire: one of 40cm and three of 15cm each one.

3. Creando circunferencias...
Una vez cortados los trozos de alambre, deberemos darle forma de circunferencia y cerrarla usando un poquito de cinta adhesiva o washi tape. No importa que no queden perfectos, ya que van forrados de lana.
3. Doing circumferences...
When we've got the wire cut, we'll make circumferences with the wire pieces and close them using washi tape. Don' worry if their not perfect, the are lined with wool.

4. Forrando los aros...
Elegimos la lana con la que queremos forrar los aros, en este caso yo elegí el color azul.
4. Lining the rings...
Choose the wool for line the rings, I've chosen the blue one.


5. Comenzamos a tejer...
Para hacer el entramado utilizaremos la lana del otro color (en este caso un verde limón), y trenzamos dibujando un hexágono.
5. Starting to spin...
To spin the web we'll use the other colored wool (I used the green one), and spin it drawing a hexagon.

Tras la primera vuelta, daremos una segunda, pero esta vez la hebra de lana se va enganchando a los lados del hexágono anterior... y así sucesivamente hasta dejar un pequeño agujero en el centro (Es importante tensar la lana al hacer en entramado para evitar que se mueva o se suelte, consiguiendo así un dibujo geométrico).
When you finish the first round, we'll do the second one, but this time the wool is tied to de last hexagon sides... do it round and round till you've got a little hole in the middle (Pay attention tightening the wool, if it's not tense it can undraw the geometric figure).

6. Terminación del entramado...
Para terminar el entramado utilizaremos una cuenta o bolita que colocaremos en el mismo centro y ataremos con un pequeño nudo para evitar que se nos deshaga la figura.
6. Finishing the web...
For finish the web we'll use a bead that put in the center of the hole. Tie it to secure the web.

(Los pasos 4, 5 y 6 deberemos repetirlos con cada uno de los aros)
(Numbers 4, 5 and 6 must be done for each ring).
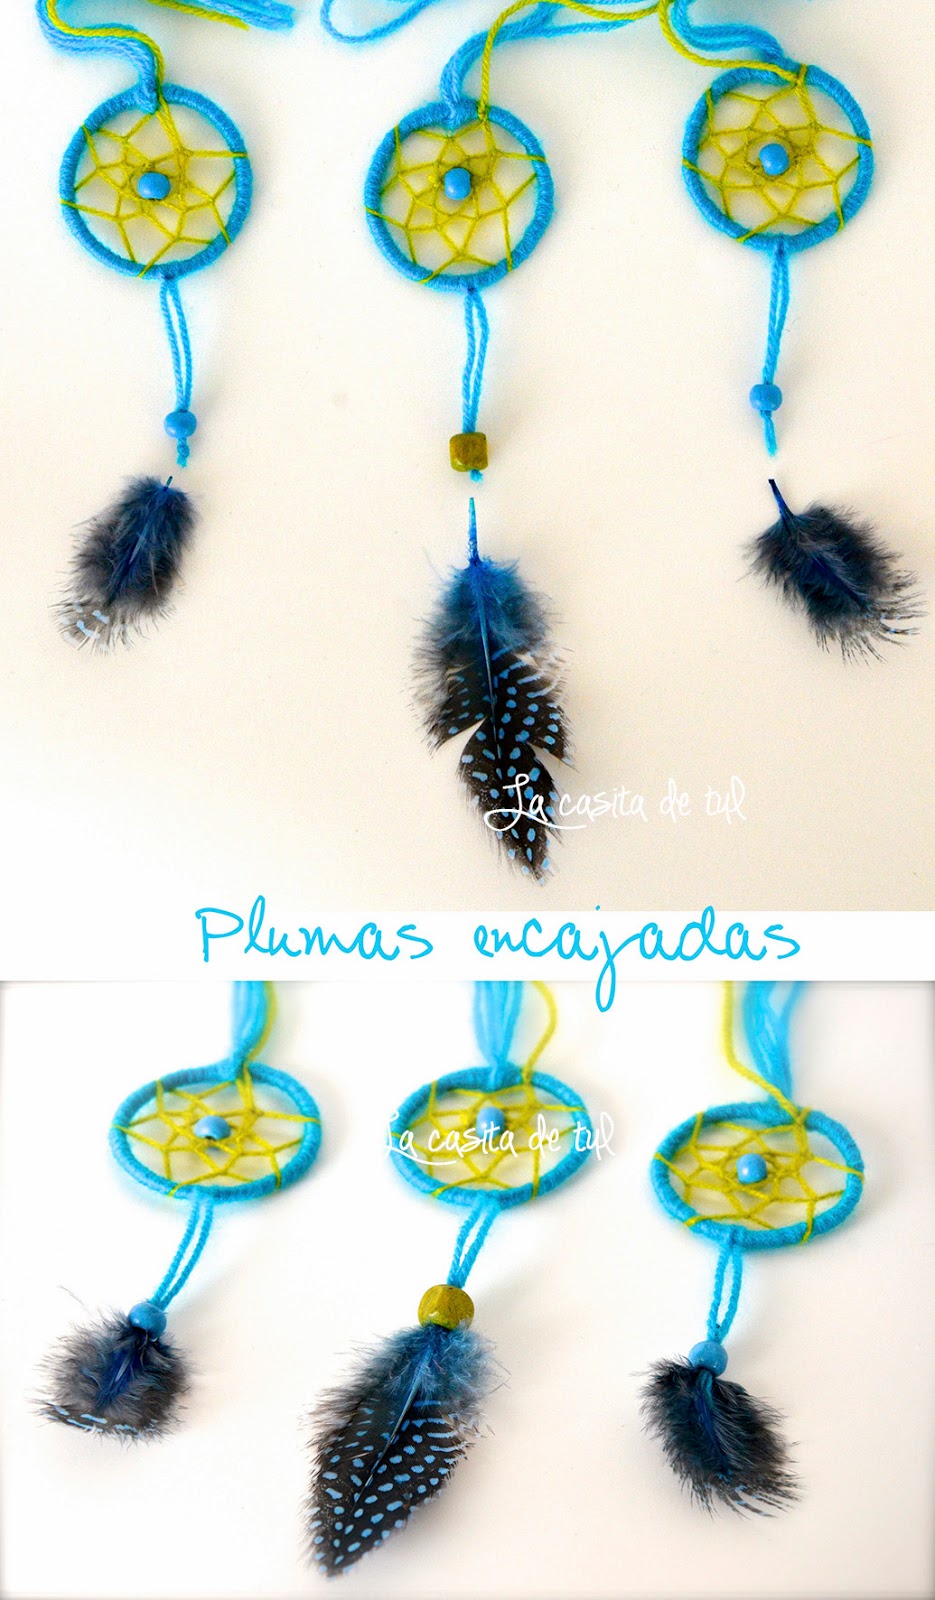
7. Colgante de plumas...
Cortamos tres hilos de lana de unos 12cm cada uno (uno por cada aro pequeño), los atamos e introducimos una cuenta.
7. Feathers hangers..
Cut three pieces of wool with 12cm each one (one for each little ring), tie it and pass it through a bead.

A continuación los anudamos cada uno a su aro:
Go on putting each one with its ring:

Por último introducimos las plumas en el agujero de las cuentas haciendo un poco de presión. No es necesario pegarlas, puesto que el nudo de la lana y la base de la pluma se encajan en la cuenta.
For last put the feathers through the bead hole pressing a bit. It's not necessary to glue them, the wool and the feather fit perfectly into the bead hole.
8. Unimos todo...
Para finalizar, atamos los aros pequeños al grande... y ya tenemos nuestro atrapasueños!!!
8. Join everything...
Now you can tie the little rings to the big one... and you've got your dreamcatcher!!!

Vamos... es muy fácil, ¿a qué esperáis para haceros uno? Es una idea genial para hacer también con niños. Y si os animáis, quiero verlos!!!
Come on!... it's very ease, what are you waiting for? It's a great idea to do with kids. And if you dare... I want to see it!!!
Besitos y más besitos desde La casita de tul...
Kisses and hugs from La casita de tul...
Me lo apunto para hacerlo con Emma.
ResponderEliminarTe quedó precioso! Me encanta la combinación de colores :)
ResponderEliminarChoni, me encantó este DIY, traducido y publicado con el crédito adecuado, por supuesto, en mi blog, que está em la tab DIY - FAÇA VOCÊ MESMO ... Espero que me he explicado bien en su idioma :)
ResponderEliminarbruxynhacarioca.blogspot.com.br
Me Encanta!!!!!!
ResponderEliminarGracias guapa!!! Quiero ver uno en tu clase!
EliminarMil gracias, este año mi hija de 6 años se disfrazan de indios anericanos en su clase y nos toca a cada mami hacer un atrapasueños con su hija/o y tengo que decirte que nos a encantado el tuyo e intentaremos copiarlo....mil gracias desde Castellón 😘😘
ResponderEliminarMil gracias este año en la clase de mi hija de 6 años se disfrazaran de indios americanos y nos toca hacer un atrapasueños con ellos y este nos s encantado...te lo copiaremos y de nuevo mil gracias...desde Castellón 😘😘
ResponderEliminarMuchísimas gracias a vosotras! Me alegra mucho que os haya gustado!
ResponderEliminar